Showing posts with label sewing stuff. Show all posts

Monday, August 22, 2011

 Shabby Roses Everywhere

Why hi there! How has your summer been!?!?
My girls return to school next week.  
I have mixed feelings.  
It will be nice to have their room stay clean.
  And to not have the doorbell ring EVERY 5 MINUTES.  
But honestly… I'm going to miss the giggles, the lazy mornings and the sunshine.

Although the other day Momo was at preschool (he started a couple weeks ago).  And I took the opportunity to run to a few shops while he was gone.  It was just me and my girls.  Every once and awhile while browsing through the store I'd have a near panic attack.  I'd realize it was waaay too quiet and Momo was no where to be found.  I caught myself looking around fretting that he had made a run for it, was smashing displays, or climbing the shelves!   When my horror would suddenly be replaced with glee. He's at preschool… silly me.


So I've been busy the last few weeks.  
Here's what I've been up to!...

A whole lot of long stemmed fabric roses.
   Goodness they're lovely.  
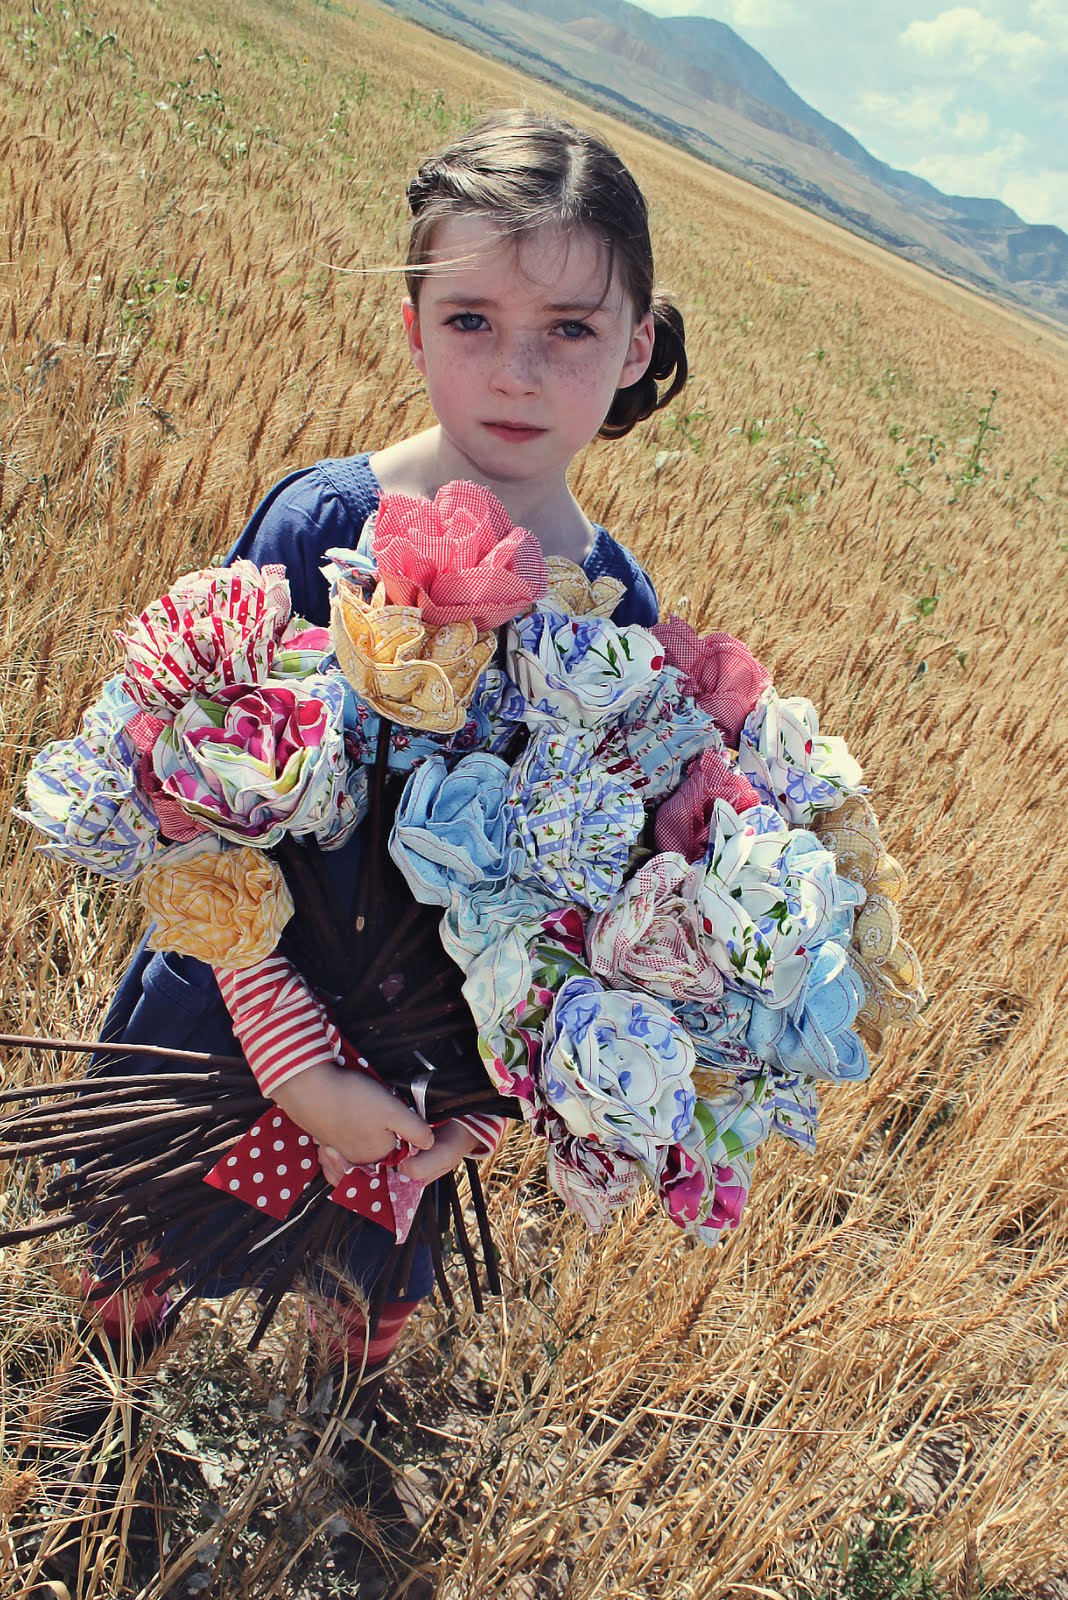
I purchased a bunch of fabric to make them in the spring.  I started, honestly I did, but spring is crazy busy and I don't know what I was thinking, because they are not a quick project.  Anyway, they are now finished. 


So I have a few up on etsy!  And because I have so many DIY junkies (go team DIY) I've also created a DIY long stemmed fabric rose kit.
  It comes with 12 stems, and 12 strips of 5 inch fabric, and even dictionary paper (sew them together and package your roses up all pretty).  So you can make your own dozen without gallivanting around, searching for everything and just get to the creating part!
Just in casey, here's a linky to... 
MY ETSY
So here they all are.   
Sitting in my living room, wrapped up all pretty and waiting for a good home.  
Sigh… I might have a hard time letting them go.
  Look how happy they are!
And here's a quick link back to my 

Tuesday, June 1, 2010

 Long Stemmed Fabric Flowers

So the last few weeks have been overwhelmingly filled with busyness.  And this week is no exception.   Criminently this time of year always about does me in. 

However I thought I'd pause and blog a little tutorial.  All of the fabric flowers out in blog land just kill me.  They are all so fabulous.  I wanted to add a bit of fabric flower goodness to my studio.  I've had these on the brain for quite some time and I finally got around to creating them.  I think spring inspired me.   So here's how they turned out…
1 dozen long stemmed fabric roses!
Now my studio is wearing a smile.  Now If only I could keep it clean. Hmmm….

So here is how I made them.
1. Cut fabric (selvage to selvage) in 5" strips.  (approximately 5"x 45" long strips).
2. Fold strips in half lengthwise (wrong sides together) and press. Your strip is now 2.5" x 45-ish" 
3. Trim off selvage edges (finished edges).
4. Open up strip.  Sew a gathering stitch along the pressed seam. Fold back into  place. 
5.  Now to cut the petals.  Scallop the open ends of the strip.  Each scallop is approximately 2.5 inches.  If you make a small mark at the open end every 2.5 inches it will help guide you as you cut.
6. At one end make what I'll call a tail.  It's about one inch wide by at least 4 inches long.  (See photo, because I'm dreadful at writing directions) 
7.  To make things easier, I then use the first one and place it on top of another strip and use it as a pattern to cut the scalloped edge.  These don't need to be "perfect."
8.  Now back to the sewing machine.  Sew the open ends (scalloped edges) together.  I like to use a contrasting thread, but you can do what ever you please.  (FYI… I was silly and still had my machine set for a gathering stitch on the photo.  I guess you could do that, but it looks better as a regular stitch.  So disregard the stitch length in the photo).
9. Now take your tail and tie it around the end of a stick.  Make sure the end of the tail is pointing upward from the stick.  (Not pointing downward). Again… see photo.
10. Now wrap the tail around the top of your stick.  As you wrap come up at a strong angle, and then down in the opposite strong angle.  This creates a "point." (Play with it before you actually glue it, so you make sure you get the right look, and so the end of the stick is completely covered). Glue in place.  And there is the center of your rose! 
11.  Now carefully gather the remaining fabric.  Be ginger with it, you don't want the string to break.  Tie the thread together once gathered. 
For a closed rose…
12.Have your glue gun handy.  Add small dab of glue  on stick and wrap the fabric around it.  Repeat until you have wrapped the entire strip of fabric around the stick.  (Try to keep the glue on the "inside" of the rose… so you don't have any showing).
For an open rose…
-Follow steps 1-11
12. With glue gun handy, add a glob of glue to the stick and wrap the fabric around the stick.  Wrap the fabric 1 to 1.5 times around. 
13.  Now with your glue gun, pull a line of glue out from the stick, onto the fabric (about 1/2 inch… it's not a perfect science).  Follow with your fabric.  Hold in in place so glue dries.  Then continue.  

 When you can see that you will have just enough to wrap the remaining fabric around the stem,  tapper your glue line in towards the stem.  Follow with the fabric.  Then glue the last of the fabric tightly against the stem.  And there is your open rose!
Lovely!  
I experimented placing my roses in two different vases.
A classic cylinder vase.  
And a long rectangle vase.  
I'm crushing on the rectangle.  I added extra sticks with fabric leaves.  Perfect for the island/workspace in my studio.  
Alright,  so once upon a time I said if I'm making one I might as well make two and have a giveaway.  It appears my offer still stands.  So I'm giving away ...
1 Dozen Long Stemmed Fabric Roses
(Vase not included... you'll have to add that yourself;)
So leave a comment to enter.  Let's see… if you don't know what to write, tell me your favorite flower.  
I'll close the giveaway on sunday, and post the winner monday.  Hooray for free stuff!

This giveaway is now closed;)
Update: I occasionally will have flowers like these for sale on etsy.
Here is a link ...
MY ETSY 
Update #2: I have a tutorial for these without the stems... for a hair clip or brooch.  Here is the link.
Roses without the stems.

Wednesday, February 24, 2010

 Crushing on Ruffles

A couple weeks back while waiting for Ride to come skipping out of preschool, I shuffled through my subscription of Country Living. While perusing it my eyes fell upon this...
It made me grin.
To explain... 
Sometime ago I discovered these shower curtains... 
and fell deeeeply in love.  
But our courtship wouldn't last... the price tag was not budget friendly, $96.00-$165.00...gulp...yowzers!   After some contemplation I resolved to construct it.  And here is the result of my infatuation...
It cost me less than $25.00  

After I completed this project an idea materialized... what if I made a
fabulous ruffled tablecloth?!  
And this is why the Country Living photo made me smile.
It was exactly as I imagined.
Now I must create it.

Now... I'd love to give in-depth instructions, but I wasn't blogging when I made this little gem.  So I didn't save what I had jotted down on paper.   If you really want to tackle this and you feel like you need a little direction, email me, leave a comment, or give me a ring.  We'll chat.  If enough people want instructions, I'll write some up.  
Wouldn't they be scrumptious as regular curtains too?  

When I make the tablecloth, I'll take care to make directions as I go. 

Oh... and I found these at Target just after I finished the curtain.  
I did a happy little jig in the aisle.